Ultimate intro to Power Query M Language
- Vojtěch Šíma
- Feb 7, 2025
- 14 min read
Updated: Jan 10
tl;dr "M" is a language used in Power Query to transform, filter, and combine data. Power Query automatically generates M code based on your "clickable" actions, but you can also write it manually for more complex operations. M is primarily written by calling pre-built functions that modify data step by step, making it intuitive and easy to learn.
Disclaimer: This article is aimed for beginners and will not go into depths of M. Goal of the artcile is to introduce you to "M", so you can start using it today on beginner level.
What's "M"?
M doesn’t stand for "Microsoft," as you might expect. Instead, it refers to "Mash-up," reflecting its purpose—combining multiple data sources into a single, well-structured dataset or query. However, this is an informal explanation, as Microsoft hasn’t officially defined what "M" stands for.
The M language is primarily used in Power Query (Power BI, Excel, Dataflows, etc.), where its main purpose is to shape datasets according to your needs. This includes transforming, filtering, and combining different data sources into one. If you've worked with Power Query, you may have noticed M code in the Formula Bar. Every action you take (inside your query) in Power Query generates M code in the background—meaning you've already written M, just indirectly.

Why is "clicking" not enough
Clicking—interacting with the UI—is the go-to way when using Power Query, and it makes sense. Power Query gives you a ton of options to modify your data, and most of the time, that’s all you’ll need. But when dealing with poorly structured data or when heavy modifications are required—and fixing it at the source isn’t an option—you might run out of buttons fast. That’s when it’s time to start writing the "buttons" yourself.
A simple example would be removing numbers from text or vice versa. Imagine you have a column with text values, but for some reason, each entry also includes an ID of variable length.

Your goal would be to either keep the numbers or text. Let's try the latter and keep the text only. For that you would have to write something like this:

= Table.TransformColumns(source, {{"customer", each Text.Remove(_, {"0".."9"}), type text}})
I know there’s technically a function inside Split Column that lets you split by digit and non-digit. However, it adds extra steps since it creates a new column instead of modifying the existing one.
As you can see, the code uses a couple of built-in functions that take parameters. That’s M in a nutshell—you build a sequence of steps utilizing these functions, gradually refining your dataset.
Now, that was just a demo. Let’s take a step back and start with the baby steps of M language.
The concept of M
"M" is a case-sensitive formula language, and remembering this will save you a lot of struggles later—so keep it in mind. The only purpose of M is to make your data pretty (or ugly if you like to struggle).
M code is essentially a sequence of variables (steps) that gradually refine your dataset. Each step builds on the previous one, creating a continuous flow of improvements (generally speaking). To define these variables, you need to use the keywords let and in.
let, in ("letin") and variables
let and in are paired keywords, meaning every let must have a matching in. You can nest multiple "letins" together—just keep an eye on the count.
let allows you to initialize variables, while in defines the output, which can be a variable or, frankly, anything else.

let
    a = 10,
    b = 20
in
    a+b
This simple snippet of code adds two variables and returns the total using the in part.
Inside a let-in expression, you can define as many variables as you want, with each variable separated by a comma. Returning directly the result is fine, and you can leave it as is.
However, my personal preference is to always return a variable instead of writing the final expression directly. Why?
Easier Debugging – Instead of rewriting the outcome multiple times, you can define everything as a variable and swap them as needed to see what’s happening at each step.
Better UI Visibility – If you return a variable (especially the last one), Power Query will generate a sequence of visible steps in the Query Settings → Applied Steps window, making it easier to track and inspect your transformations.

Let's change it and add a third variable that sums up a and b—let’s call it c.
Instead of returning the sum directly, we’ll store it in c and return that variable:
let
a = 10,
b = 20,
c = a + b
in
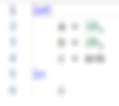
cNow the Query Settings will also look better, allowing us to visually switch between each defined variable in the Applied Steps window. This makes it much easier to check the validity of each step and understand how the data is transformed.

There’s no strict rule about escaping characters, indentation, or spacing within a let-in structure. You have flexibility in formatting. However, my personal preference is to keep it tidy by properly indenting nested elements, making the code more readable and structured.
Variables can be named almost anything—you can use camelCase, snake_case, kebab-case, or PascalCase. You can even include spaces in your names, though I wouldn’t recommend it for practicality.
Any variable that contains a special character (*space, @, #, $, %, &, , -, etc.), a reserved keyword, or starts with a number requires special notation: #"variable name".
Keep in mind that variable names must be unique (at least within a single "letin"), and using the same name with and without special notation still counts as one.

Basic operators
M has pretty straightforward basic operators that are very intuitive. I'll divide them into a couple of categories:
Arithmetic Operators
+ Addition
- Subtraction
* Multiplication
/ Division
Comparison Operators
= Equal to
<> Not equal to
< Less than
> Greater than
<= Less than or equal to
>= Greater than or equal to
Logical Operators
and Logical AND
or Logical OR
not Logical NOT
Text, Record, List
& Concatenation
Special Operators
? - field can be nullable ( [field]? )
?? - coalesce - return the first expression that isn't null ( null??"abc" )
.. - interval ( {0..9} ) - returns list from 0-9
Basic data types
In M we have several data types with unique notations, here's a basic list of those that you will most likely need, the actual notation is highlighted:
Number Types
number → Decimal numbers (e.g., 123.45)
integer → Whole numbers (e.g., 10)
Text Type
text → String values (e.g., "Hello")
Logical Type
logical → Boolean values (true or false)
Null Type
null → Represents missing or undefined values
Date and Time Types
date → #date(2024, 2, 5)
time → #time(12, 30, 0)
datetime → #datetime(2024, 2, 5, 12, 30, 0)
datetimezone → #datetimezone(2024, 2, 5, 12, 30, 0, 1, 0)
duration → #duration(1, 2, 30, 0)
List Type
list → Ordered collection of values (e.g., {1, 2, 3})
Record Type
record → Collection of key-value pairs (e.g., [Name = "John", Age = 30])
Table Type
table → Structured data with columns and rows (e.g., #table({"Column1", "Column2"}, {{1, "A"}, {2, "B"}}))
There are a few more, but these are the most commonly used ones. In M, you can mix and match data types, meaning you can have a list where each item is a record, and that record can contain a list, and so on. If you’ve ever worked with a nested JSON file, that’s essentially what you can build in Power Query too.
Please note that the end goal for loaded queries (loaded into the Power BI model) should generally be a flattened table rather than nested structures.
Side note, Working with JSON in Power Query is quite a pleasant experience—parsing it is just a matter of a couple of clicks.
Core keywords
In M, there are many other keywords, but since this is a beginner’s guide, I’ll only mention the everyday-use ones:
Conditional Logic
if ... then ... else → Defines conditions for branching logic
Example: if 5 > 3 then "Yes" else "No"
Functions & Iteration
each → Creates an anonymous function for iteration
Example: List.Transform({1, 2, 3}, each _ * 2)
as → Specifies the expected data type for a parameter or variable
Example: (x as number)=>
Error Handling
try ... otherwise → Catches errors and provides a fallback value
Example: try 1 / 0 otherwise "Error"
Type Checking & Conversion
is → Checks if a value belongs to a specific type
Example: 123 is number
type → Defines a custom data type, enforces column types, or ensures type consistency
Example (custom type): type [Name = text, Age = number]
Example (column type in table): Table.AddColumn(tbl, "column", each 1, type number)
Concept of built-in functions
As I mentioned earlier, M has hundreds of built-in functions you can use to modify your data. To make your life easier, they’re neatly categorized, and their names often describe exactly what they do.
As a bonus, when you initialize a variable, Power Query will whisper the required parameters along with a brief explanation.
For example:

Alternatively, if a function has optional parameters, entering all the mandatory ones and adding a comma will reveal secret tips for you. One comma at a time will uncover additional optional parameters. If no tips appear, that means there are no optional parameters.
Technically, you can just spam commas until you see the optional parameters. Like this Table.AddColumn(,,,)

Alternatively #2, if you're a fan of clicking, you can interact with the little arrows around the number in the bottom left. This will reveal all the secrets—even without providing all mandatory parameters.

As you can see, this function (as the name suggests) adds a column to your table based on your criteria. The function name typically consists of the data type, followed by a dot, and then the actual operation it performs. This naming syntax is generally consistent across all functions in M.
How to start writing M
Now that we’ve covered the basics and beginner concepts, how do you actually start using all of this? Does learning M mean you have to stop clicking buttons? Nope. Clicking buttons is still a valid practice that will save you a lot of time—even if you’re the best M expert in the world.
However, if you find yourself clicking multiple buttons just to accomplish a single task, take a moment to pause and consider whether a single, efficient M step could achieve the same result while optimizing performance.
Example #1
Probably the #1 go-to operation.
Let's explore one of M's most commonly used functions: Table.AddColumn(). As you might have guessed, this function adds a new column to a table. Let's take a closer look at how it works.
Table.AddColumn(table as table, newColumnName as text, columnGenerator as function, optional columnType as nullable type) as tableThis function accepts 4 parameters, 3 of them are mandatory, one is optional.
table as table - with every table function, the first parameter is usually the source table. This is the table where you want to add your new column, and most likely, it’s just your previous step.
newColumnName as text - this one’s easy—just enter the name of your new column as text, meaning it should be in double quotes.
columnGenerator as function - this part can get tricky. But as a beginner, just remember—you need to write an expression that applies row by row. The expression can return a number, text, boolean, or even a table. You can also access other columns, with values taken from each row individually.
The whole parameter has to be written as a function (I’ll explain that soon). That’s the tricky part!
optional columnType as nullable type - in this part, you can proactively define the data type of your new column. Typically, you’ll write something like "type text" or "type number". Doing this upfront saves you an extra step of adding a "Changed Type" transformation later.
Let's add some real-life columns together.
This is our base table and applied steps.


We want to add a new column named "totalSales", which will multiply quantity by unitPrice. This should feel familiar—whether you're adding a new column in Power Query, working with an Excel formula, or using the SUMX function in DAX.
First, let’s initiate a custom step. You can do this by clicking on the function icon next to the formula bar. If you don’t see the formula bar, go to the View ribbon and enable it by clicking Formula Bar on the left.

If you succeed you'll see the last step as the value in Formula bar.

Let's type call our function Table.AddColumn().

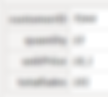
The table will be the previous step, which in our case is "changeTypes". The new column will be named "totalSales". The expression will calculate the product of two columns: [quantity] and [unitPrice]. The optional parameters will be of type number, specifically "type number".

= Table.AddColumn(changeTypes, "totalSales", each [quantity]*[unitPrice], type number)You can notice that in the code, there's an extra keyword that I didn't mention—"each". This is a keyword or kind of syntax sugar. Each can be explained in its own article, but for now remember that each is shorthand for (_)=>, meaning a function with a parameter "_". This parameter represents the current row as a record.
()=> is the generic syntax for a function that accepts parameters inside.
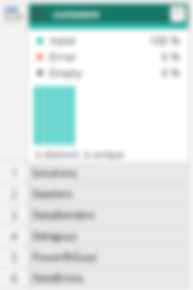
If we were to return "_" itself, we would get the entire row for each iteration:
However, in our case, we just take two fields, quantity and unitPrice, and multiply them.
Technically, you should write it this way: _[quantity] * _[unitPrice], as "_" represents the current row, and you want to grab fields quantity and unitPrice from it. However, with each, M allows the notation even without the underscore—that’s how M makes things easier for you, so you don’t have to think about it too much.
Anyway, that's it, you wrote your first M line.
Lastly, in Applied Steps, this process will generate new step called "Custom1".

If I can teach you one thing, please rename your steps according to what they do. So, double-click the step or press F2 and give it a proper name—something like "addTotalSales".

This habit will make your life way easier—not just for you, but also for others. Imagine that in six months, your report breaks down, and you have to figure out what each step does again—because trust me, you won’t remember.
Of course, your report won’t break! But let’s say you inherit a report from someone who didn’t have this habit… now that’s a different story.
Example #2
Less common for beginners, but a game-changer as you advance!
Let's look at an example that I shared previously, removing digits from a text.
I chose this scenario because it showcases a lot of small techniques you can apply. In reality, your own use cases will likely be much simpler, so don’t feel discouraged if you don’t grasp it right away—I wouldn’t either!
First, let's click our way through, we have a couple of options. We can replace all digits (10 steps, 0-9) with empty values, this approach is highly inefficient tho. The second option could be the split of columns. Let's do that one.

We can examine the generated M code in the Formula bar.
= Table.SplitColumn(source, "customer", Splitter.SplitTextByCharacterTransition({"0".."9"}, (c) => not List.Contains({"0".."9"}, c)), {"customer.1", "customer.2"})This is pretty wild, even for seasoned veterans. However, there are glimpses of techniques we can borrow.
All right, we’ve clicked our way through—now let’s take a step back and figure out how to do it better. The main criteria are: this solution creates an additional column (which we don’t want), and we only want to keep the text within the existing column. So, what’s the plan?
First, let’s initiate a custom step. You can do this by clicking on the function icon next to the formula bar. If you don’t see the formula bar, go to the View ribbon and enable it by clicking Formula Bar on the left.

Now, we know that we want to modify the Table. Let's then start typing Table and see what options we have:

There are many functions, and your first search might take some time—but that’s okay.
One potent and versatile function worth learning is Table.TransformColumns(). This function lets you define a list of columns and specify transformations for them. It’s the go-to function when you want to modify existing columns while keeping them intact.

We have two mandatory parameters. The first is the table, which should be straightforward—it’s usually your previous step, and in our case, it’s a step called source.
The second parameter is a bit special and requires a specific syntax. If you're ever unsure about a function, Microsoft has official documentation available, so always feel free to check it when needed. For this particular one, link here.
The syntax for the second parameter is a list of column transformations, where each item is another list containing 2 to 3 parameters. It looks something like this:
Table.TransformColumns(source,
    {
        { column name, transformation, new column type }
    }
)
The first parameter is the name of the existing column—in our case, "customer". The next parameter is the transformation function, which defines the operation applied to each row in that column.
In our case, we want to remove digits from the text. Now, we need to find a function for that. Let’s try a similar approach.

Again, we have plenty of options to choose from—functions like Text.Remove, Text.Replace, and more. Many of them can help us achieve the desired outcome, but some will be more efficient than others.
Let’s go with Text.Remove.

Text.Remove requires two parameters. The first is the text we want to modify, and the second is the characters we want to remove.
The text we’re modifying is represented by the underscore (_), which holds the current row’s value when using each. This concept could be a topic of its own, but for now, just remember: whenever you use each to define a function, the current item in scope is accessible via _.
In our case, Table.TransformColumns will iterate through all rows in the "customer" column, and _ will represent the value of each individual row as it gets processed.
The second parameter of Text.Remove requires us to list individual characters we want to remove. In this case, we want to remove all digits, meaning 0-9. Since we only want to remove each occurrence of these digits individually, we need to define a list containing all 10 digits.
We can write it either manually:
{"0", "1", "2", "3", "4", "5", "6", "7", "8", "9"}Or more efficiently, using an interval:
{"0".."9"}The .. operator represents a range, and Power Query will automatically fill in the missing values between "0" and "9". Even though these are written as text, Power Query looks up their Unicode values and fills in the sequence based on the numerical representation of the start and end characters.
In this case, it gives us the same result as the manual list. Similarly, this approach works for the English alphabet, for example:
{"A".."Z"}This would generate {"A", "B", "C", ..., "Z"} since uppercase English letters are stored sequentially in Unicode.
When we put it all together, we get this.

Lastly, we can address the "new column type" optional parameter, which allows us to set the column’s data type directly.
By default, Table.TransformColumns removes any previously assigned data type for the modified column. To avoid having to reapply it in a separate step, we can use this optional parameter and set it to type text right away.
Pro tip: If your changes convert text to a number and you set the optional parameter to type number, Power Query might still see it as text—yeah, lovely. To make sure this doesn’t happen, just wrap the result expression in Number.From().

And that’s it! You just wrote your first M code. 🎉
This is how you’d continue—building on what you’ve learned. So remember, always think about steps that could be done more efficiently, and use M to make it happen!
Core functions to know
As a bonus, I’ll make your life easier by listing a few core functions that are super common in everyday M coding. The order has no particular meaning.
Table Functions
Table.TransformColumns(table, transformations, optional columnType) – Modify values in existing columns.
Table.ColumnNames(table) – Get a list of column names.
Table.Column(table, columnName) – Extract a column as a list.
Table.Buffer(table) – Store a table in memory for performance.
Table.SelectRows(table, condition as function) – Filter rows based on a condition.
List Functions
List.Distinct(list) – Remove duplicates from a list.
List.Transform(list, transformation as function) – Apply a function to each item.
List.Select(list, condition as function) – Filter items based on a condition.
List.Contains(list, value) – Check if a value exists in a list.
List.Count(list) – Count the number of items in a list.
List.Dates(start, count, step) – Generate a list of dates.
Record Functions
Record.FieldNames(record) – Get a list of field names in a record.
Record.SelectFields(record, fieldNames as list) – Select specific fields from a record.
Record.TransformFields(record, transformations as list) – Modify specific fields in a record.
Record.Field(record, fieldName as text) – Retrieve a specific field’s value.
Summary
M is a powerful yet intuitive language used in Power Query to transform, filter, and combine data efficiently. While clicking through the UI is often enough, knowing M allows you to optimize queries, reduce unnecessary steps, and handle complex transformations. By understanding key concepts like let...in, built-in functions, and data types, you can take full control over your data. Start small, experiment, and gradually incorporate M into your workflow—it will save you time and effort in the long run! 🚀